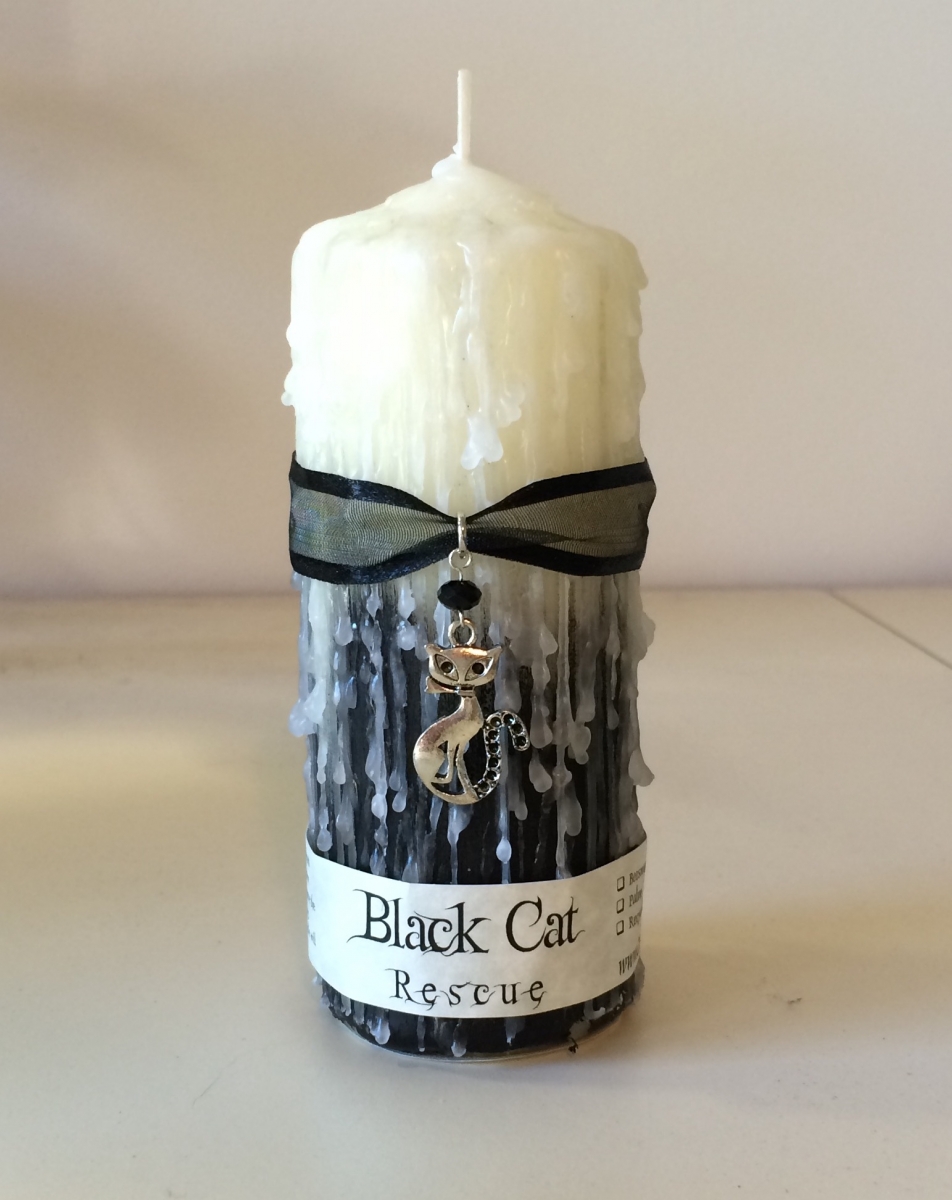
Black Cat Rescue Candles
Archives
- September 2023 (1)
- January 2023 (2)
- October 2022 (1)
- February 2022 (1)
- February 2021 (1)
- July 2020 (1)
- February 2017 (1)
- October 2015 (1)
- September 2015 (2)
- February 2015 (1)
 The Story
As we approach the darker half of the year, Halloween images of black cats, witches hats and candy are everywhere. Each year in my small Ontario hometown, a black cat seems to cross my path in need of rescue. I’m reminded of sweet Mira (short for “Miracle”) named by Pam, our gallery curator, while I was a resident artist at the old Mill. Pam came to my studio upset one day. Abandoned stray cats always seemed to find her and she was emotionally torn up. A female black cat had been living under the porch of the studio next door. Pam had been feeding her but as the weather grew colder she fretted about what was to happen to this sweet cat. Winters here are long and bitter and there was no space for her at our local animal shelter. Mira was so frightened, that it was hard for me to get near her. Something had to be done.
I spent several days befriending Mira until I felt confident that I could foster her until a shelter vacancy opened up. Mira did well under the circumstances and I kept her isolated from my other two cats. Days later a vacancy opened up and I brought her to our local Humane Society. I learned that not too many people want to adopt black cats let alone an adult one. I felt sad because Mira was the sweetest soul you’d ever hope to meet. Pam and I continued to make donations in her name until finally two elderly women adopted her two years later.
The following spring, Pam introduced me to little “Picasso”: A jet black male kitten with bright golden eyes who’d managed to get into some paint and was prancing around proudly with his newly painted white tail. How apropos that he was rescued at a visual arts center! That lively little character, got adopted much quicker! Nevertheless, a pattern was beginning to form.
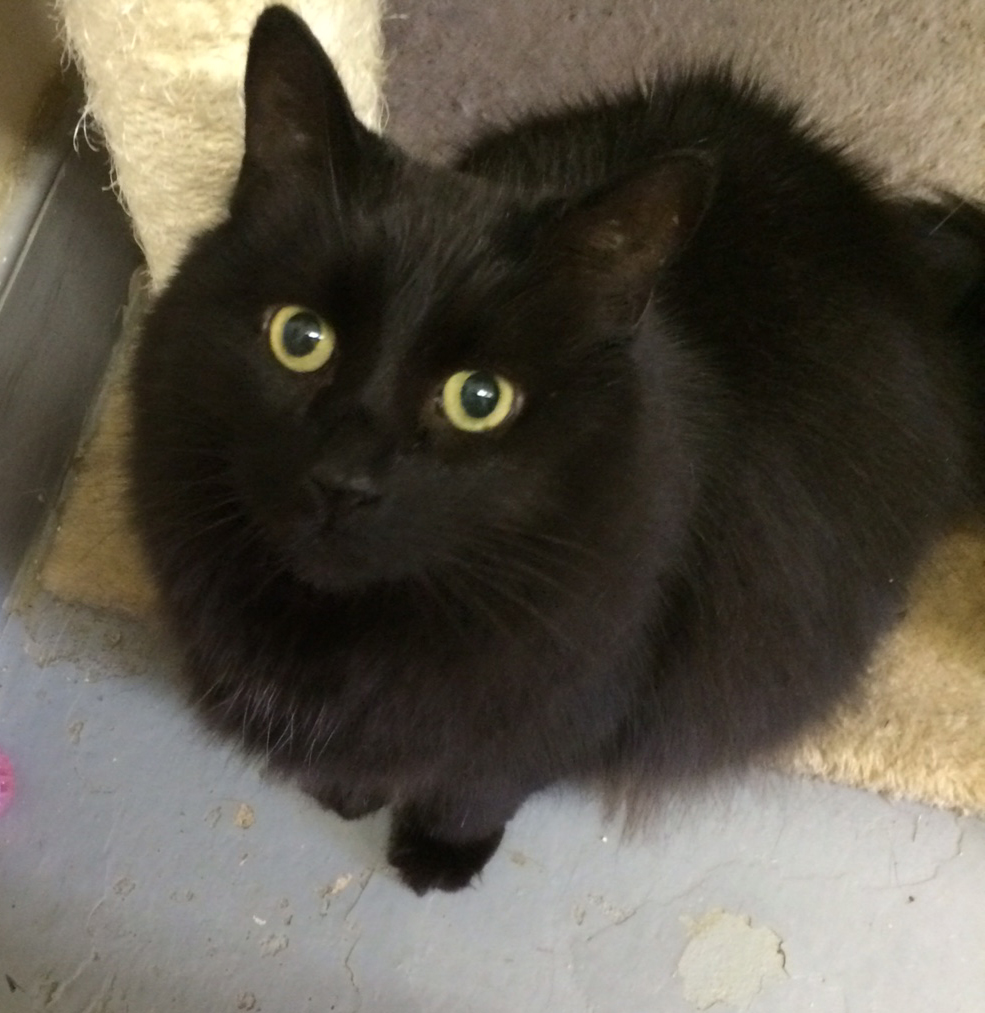
One day I got an idea and it’s one I’d like to share with you now. I started making fanciful candles with cat charms on them in October and selling them in my studio to an eager public. I then used the proceeds to sponsor black cats in various animal shelters. I call them Black Cat Rescue Candles. If there was more public awareness that black cats are just as sweet and lovable as other cats, maybe they’d be adopted sooner. Fear of black cats being “evil” still seems surprisingly common. Even my older sister complains that certain friends won’t come to her house because they’re afraid of her cat just because it’s black!! Animal shelter volunteers also told me about other unspeakable things that happen to black cats around Halloween that I won’t even elaborate upon here. What if sponsoring black cats at rescue centers buys them more time to get adopted? What do you think?
I should point out that this project is just an idea, and it’s something that I do for myself. It’s not essential to attach a cause to your candle making project unless you feel called to do so. They make great gifts and family crafts too! If my idea happens to inspire more ideas, joy, creativity, discussion and possibly save a cat or two, then I’m happy!
The Project
Truthfully, candle making from scratch is an art and science that I haven’t fully mastered. My first attempt resulted in an epic mess, the wrong type of wick, ruined pots, a lost fortune on supplies, and a pissed off husband! This time, I decided to try upcycling and not only was it inexpensive, it was so much fun!
What you will need:
- 2 white or cream colored identical candles to experiment with. When you are happy with your results, you can make as many as your heart desires and even experiment with other colors.
- 1 cat charm (many great and inexpensive designs can be found in local craft shops and online – I purchased mine on Etsy)
- 1 jump ring (add this to your charm if it only has a teeny tiny loop at the top.
- 14” long piece of ribbon. Black, white or red ribbon looks good, but go with your gut or use what’s available. You can also substitute with raffia, cord, yarn etc.
- 1 small tube of good quality black acrylic paint
- 1 paintbrush (1/2” to 1” wide works well)
- 1 small square of coarse sandpaper
- Optional: 1 cake decorating turntable (I found mine at a dollar store!)
- Aluminum foil
- A lighter or matches
- Optional: 2 pieces of 8 ½” x 11” parchment paper to print the labels.
- 1 water soluble glue stick for attaching the labels.
Instructions (to be used, re-written, adapted or abandoned completely)
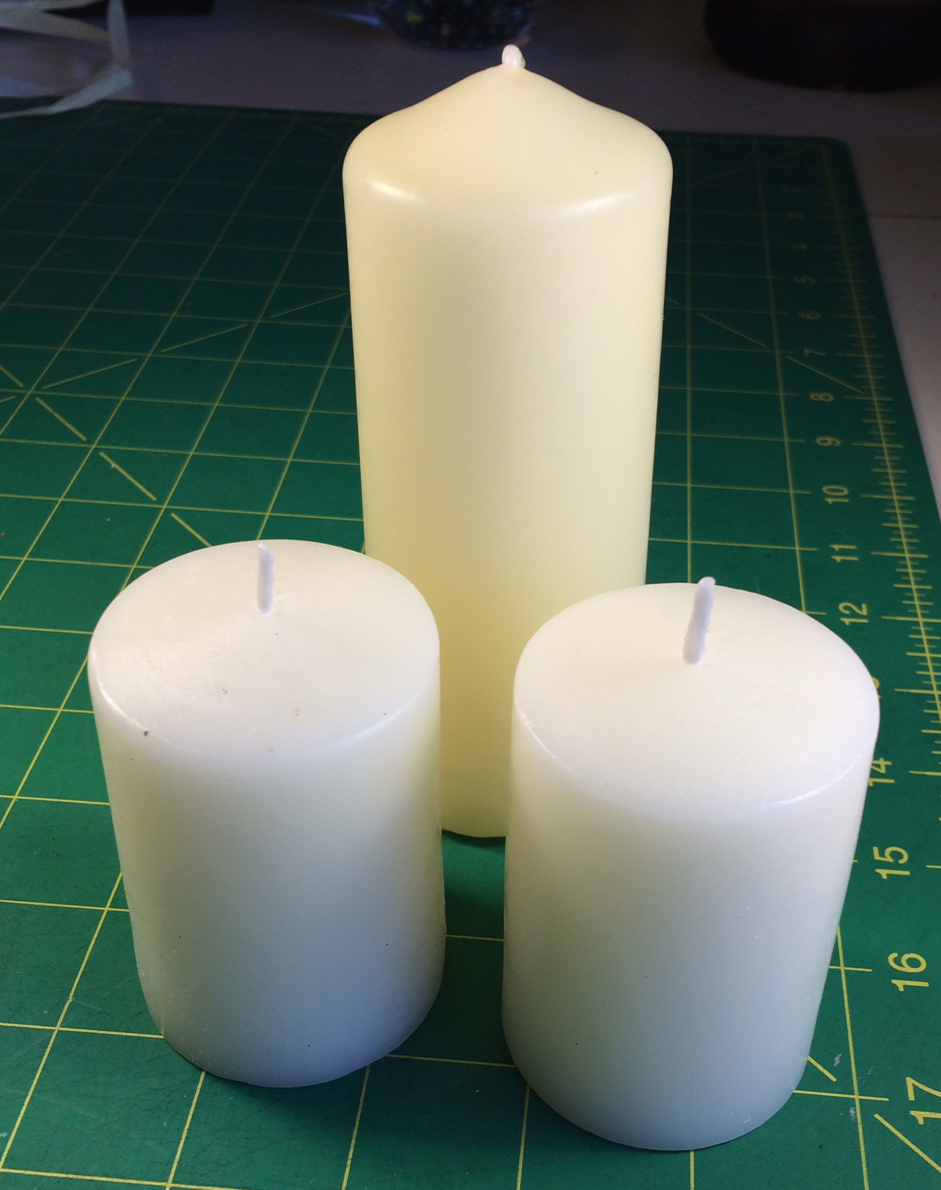
Step 1 – Choose your candles
I purchased 2 cream colored unscented pillar candles at my local dollar store for $1.50 each to experiment with (2” diameter wide x 5” high). Quality can vary dramatically, so I chose to experiment with the cheapest first. They worked well so I could afford to make plenty more! You may prefer to use natural wax such as beeswax, soy or palm so follow your intuition. Remember, the first two candles are just for experimentation and upgrades can always be made later.
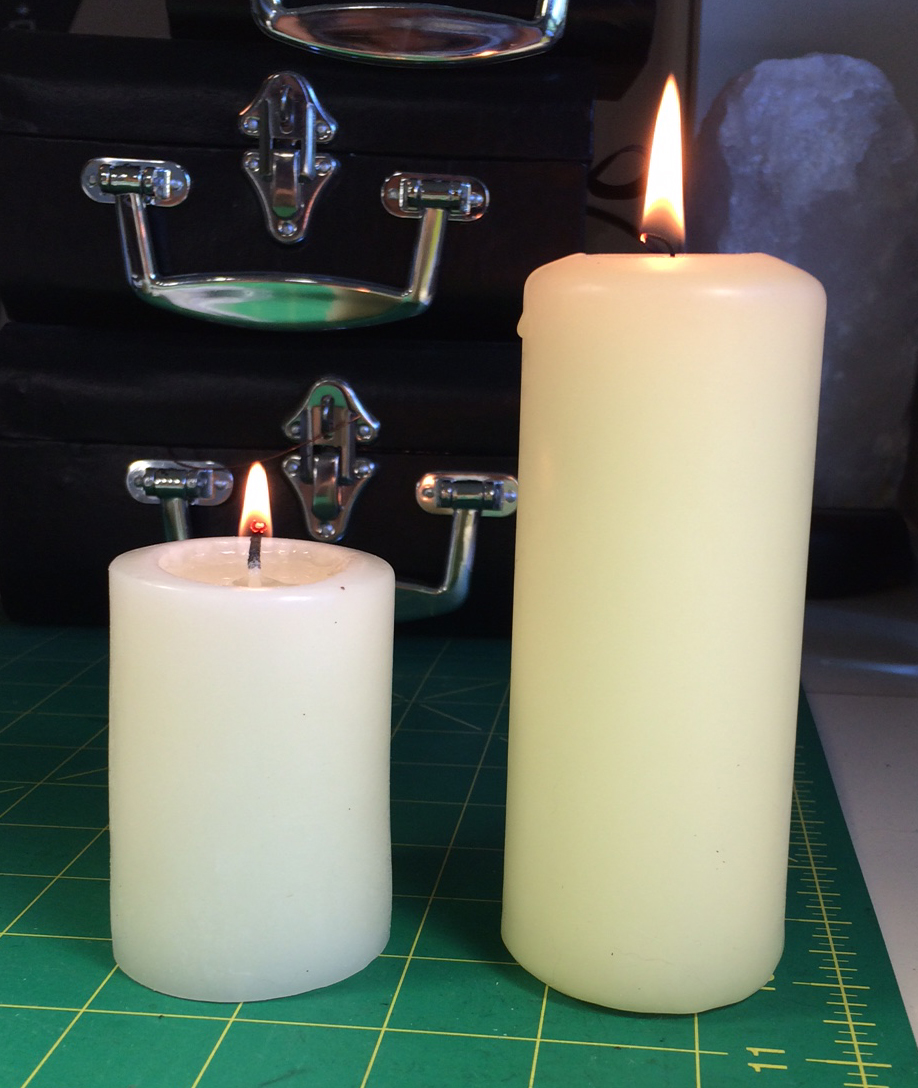
Step 2 – The Burn Test
Light just one candle with a protective dish underneath. Let it burn for at least 30 minutes and watch how it burns. Is there any black smoke? Is the wax dripping excessively and starting to make a mess? Is the flame “drowning” in the wax? Are there any offensive odors? If so, you’ve just been burned! The quality is too poor for our purposes and I would personally try a different one. Price is not always an accurate gauge of candle quality. I’ve been “burned” by expensive ones too! Once your candle has passed the burn test we’re ready for step 3!
Tip: Repeat the burn test for every new brand to be sure it meets your standards.
 Step 3 – Candle Painting
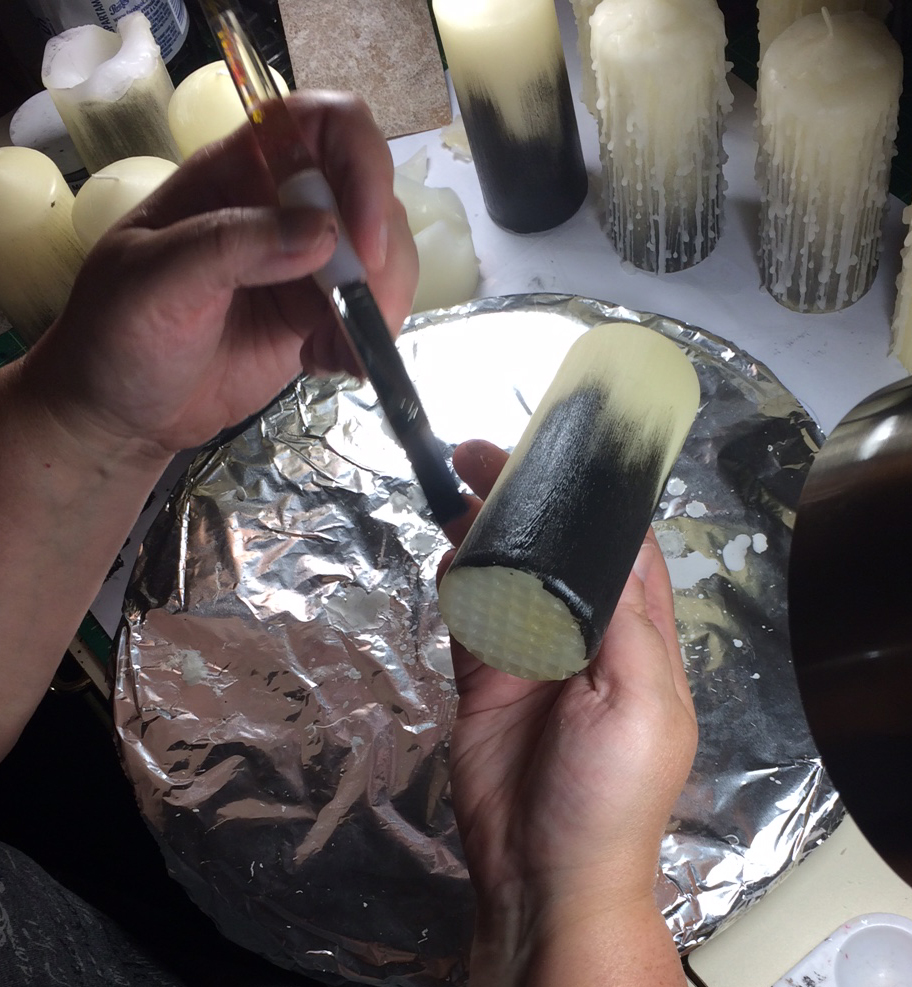
Before painting, remove any labels and packaging. In a vertical motion, use the sandpaper to remove any shininess. This will help to give the paint and wax decorating process a surface that it can “stick” to. Do not worry about how the surface looks as it will be covered up later.
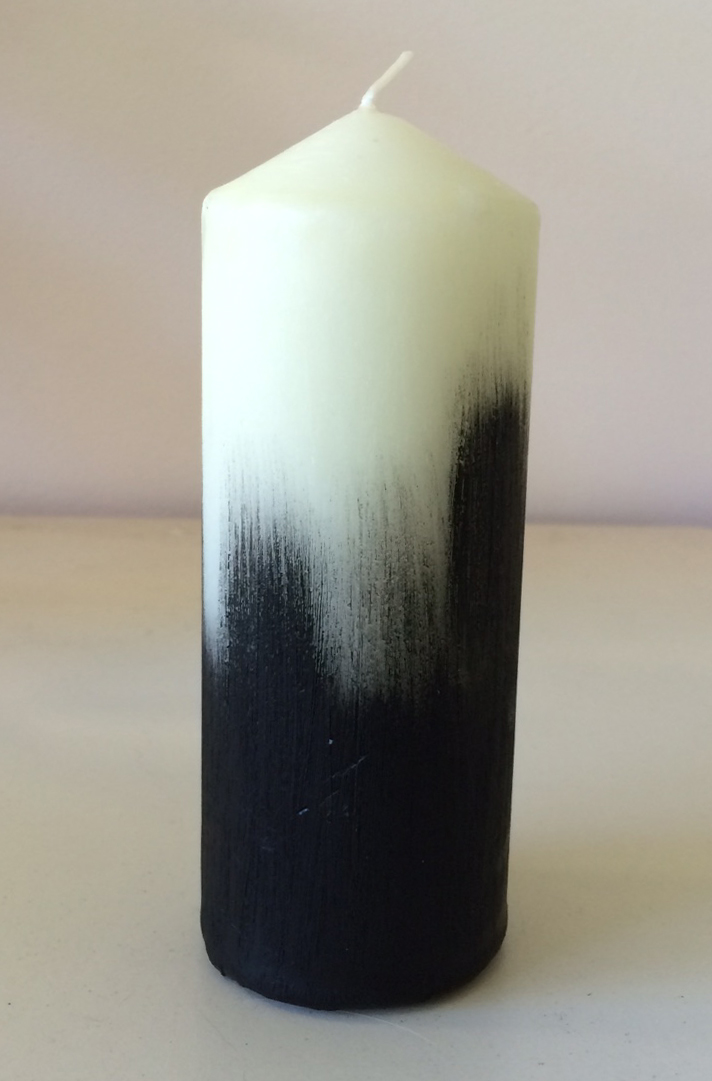
Cover your work area with newspaper and add a small dab of black acrylic paint onto a little piece of aluminum foil. Taking your unburned candle, apply a small amount of paint to the brush and begin making wispy strokes from the bottom toward the top. Leave the top half of the candle mostly unpainted with the exception of a few uneven “wisps” here and there. Allow the paint to dry for 20-30 minutes.
Step 4 – Wax Decorating
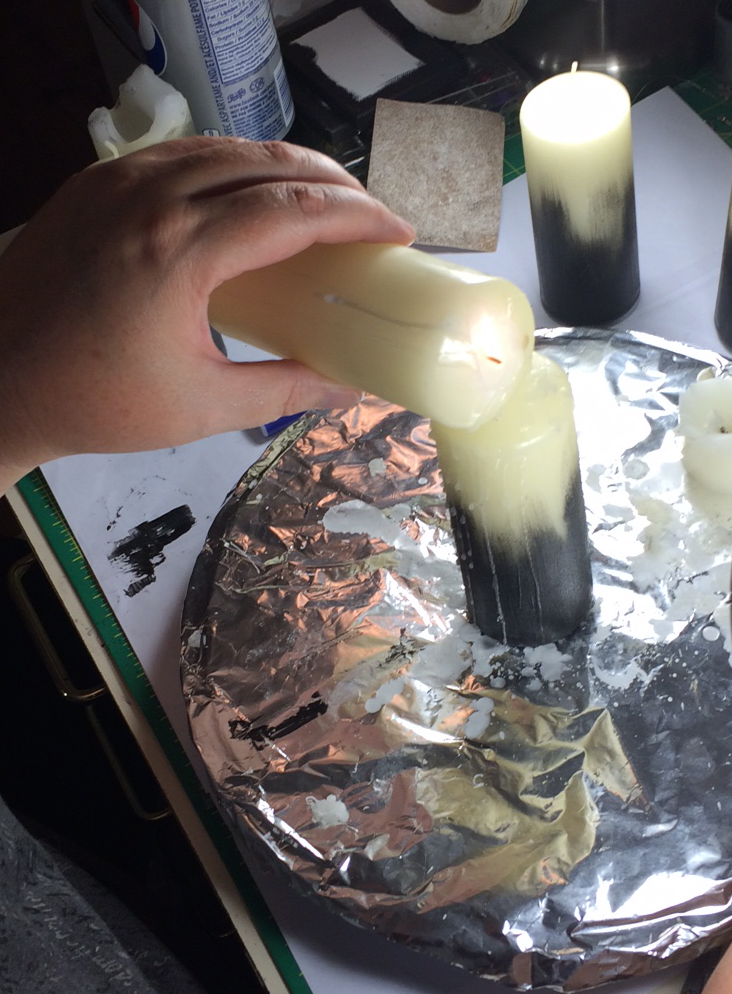
While the paint is drying, prepare your cake turntable by covering the surface completely with aluminum foil. Once the paint is dry, place the candle at the center of the turntable. Take the candle that you used previously for your burn test and relight it now. Tilt the burning candle slightly allowing the melting wax to drip onto the painted candle. Work slowly allowing the wax to drip down the sides. Rotate the turntable, creating lots of spooky drips down all sides of the candle. Experiment by letting drips fall near the wick of the candle and some along the sides. By now some wax has probably pooled around the base of the candle and you can even tilt the turntable slightly to access hard to reach areas. Add as much or as little detail as you like. When you feel your candle is thoroughly spooky, leave it to cool completely for a few hours. If you have several candles to decorate, wait a minute or two and then gently lift the candle from the turntable and leave it to cool on the newspaper. Remove any chunks around the base of the candle. Place a new candle on your turntable and keep on going!
Once you’ve got the hang of decorating your candles with wax, feel free to explore other candle colors and looks! Try new paint colors and painting techniques!
Step 5 – Finishing Touches
Once your candle is completely cool, thread the cat charm onto your ribbon and tie it around the candle with a double knot. Tie it firmly, but not so firmly as to damage your wax design. Trim off the excess ribbon.
Optional: Add a parchment paper “Black Cat Rescue” label to identify the cause. Free labels are available for download at ChristineMarieFord.com. Apply using a water soluble glue stick. Remember to sign your label and indicate what kind of wax you used.
You’ve now made your first upcycled Black Cat Rescue Candle! Experiment with new designs and themes or tailor them for your next holiday celebration. Most importantly, remember that no matter how your first candle turns out, skill comes with practice. Trust that creatively speaking, everything is unfolding exactly as it should. I went through several candles before I finally created this design which is now my favorite. Enjoy!
***My candles are also available for sale at the InSpirit Centre (downtown Georgetown) and the Upper Credit Humane Society in Erin Ontario. Proceeds will be dedicated to these sweet kitties below!


Comments
Margaret
I just wanted to say that those candles are beautifully designed. I work at the Upper Credit Humane Society and I have seen them in person and they are gorgeous going to buy a few for myself. Those cats mentioned above they are all warming, full of cuddles. I have two black cats myself which have both been adopted and I wouldn't trade them for the world.
Post new comment